Slacklining looks hard. It’s even harder than it looks. But setting up a low-to-the ground line for your kids and your inner child isn’t.
For those of you who struggle to tie your own shoelaces, there are several pre-packaged options that are a breeze to rig and come with directions. The best beginner option might be this package from Slackline Brothers. If “Do It Yourself” is your mantra, here is the beta to get your little ones walking the line:
What you need:
- 40-feet of one-inch climbing webbing. Most slackliners use one-inch webbing, but the wider the line, the easier it is. If you want to use two-inch webbing, plan on picking up a ratchet. You can pick this up at most climbing stores or from REI.
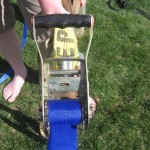
- Five oval carabiners. You can also substitute a ratchet like the one seen in Steve’s photos. It simplifies tightening the line for different weights and if you don’t already own five carabiners, a ratchet might even be slightly cheaper.
- Two six-foot climbing slings.
- If you’re using trees as your anchor points, two old towels or bits of scrap carpet will protect the tree’s bark.
Setup
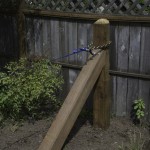
- First, you have to find two suitable anchor points – sturdy trees, posts, a trailer hitch on a car. This will be the distance your line spans. If you have 40-feet of line, look for a span of 30-feet or less.
- Start at one side. Wrap one of you six-foot-climbing slings around the object, twice if the object is small. If you’re using a tree, now is the time to pad the webbing with the towel or bit of carpet. Bring the two ends of the climbing sling together and clip a carabiner into this power point.
- Now, it’s time to attach your webbing line. The simplest way is to simply tie an overhand knot, but don’t expect to get this not undone once you’ve weighted the line. A better option is the Munter/Half Hitch demonstrated in the video. This knot releases easily, but is a graduate level knot.
- Once you’ve anchored one side, head back to your final anchor point. Repeat step two, but this time clip two carabiners into the power point.
- Here’s where it gets trickier. Take the webbing you’re using for your slackline. You need an extra bit of line. Attach two carabiners with a clove hitch. When you lift this up there should be about three feet between the anchor’s power-point and the carabiners.
- Now you’re going to employ a classic four-to-one mechanical advantage similar to a pulley system. Take the webbing’s free end and clip the line to the upper carabiner, Now run it back to the opposing carabiner. You’re creating your mechanical advantage by pulling the line back and forth. Repeat this step until you have a four to one advantage. Synch the line down tight. The less slack in the system the easier it is to walk.
- Tie off the system wrapping three half hitches – essentially three over hands – around the layered strands. Once you’ve got it tied off, you and the little ones are ready to walk the line.
Walking the Line
Practice is key. In the beginning, establishing yourself on the line is the most difficult part. Begin with your dominant foot on the line and the other foot on the ground. The line will probably shake like crazy. Don’t lose heart, it will calm down once both feet are on. In one fluid motion, propel yourself upward with your dominant foot. Use the elastic nature of the line like a slingshot. Once established, keep both feet on the line as much as possible; look ahead, not down. Pick a point – the end of the line – and keep your eyes on it. Use your toes to feel the line rather than your eyes. Don’t try to stay on too long when you begin to fall. The last point is critical, as staying on too long usually results in getting thrown powerfully to the ground as opposed to hopping off gracefully.
With your kids, begin by holding their hands as they traverse the line. Your kids will pick it up quicker than your old bones. Since kids weigh a lot less, you can set the line pretty low for them.


Nice! I set up a slackline years ago at my parent’s house and my then 7-year-old sister took to it immediately. I instantly had all her friends and neighbors asking me to set up “tight ropes” in their yards too!
Ever since I saw that youtube video i’ve been debating if the trees in my backyard will be sturdy enough for a slackline…
Slacklining is a blast, and my kids get excited any time I set up a line at our local park. And as was said, practice is the key – don’t lose heart too quickly. My first time trying it took me at least an hour before I could even stand on the line, probably just as long afterwards for my first two steps. After that the learning curve steepens, and you’ll be walking all the way across in no time.
One trick I’ve been using with my kids (4 and 2) as I hold their hands while they walk is to press my thigh against the line lightly, keeping the webbing from swaying side to side too much.
Good tip. I’ve also sat on the line to minimize swaying.
Have you tried this system:
http://www.healthierpyramid.com/slackline